Here’s how it goes:
Step 1: Make a box. If you can locate a discarded chest of drawers, you can use that. The better the box fits together, the more resonant the sound will be.
Step 2: locate a construction site and look around for some of the metal strapping tape that is used to bind together lumber. Alternatively, go to a lumber yard or a big chain store and ask them for a few yards of the stuff. Although plastic is increasingly common, you can still find the metal pretty easily. Alternative sources for keys can also include any fairly stiff but springy material; I’ve used tongue depressors and popsicle sticks very effectively.
Step 3: find some pieces of smaller flat wood (1/2″ square or so), any length greater than 4-5 inches.
Step 4: bolts, nuts, washers, nails, glue.
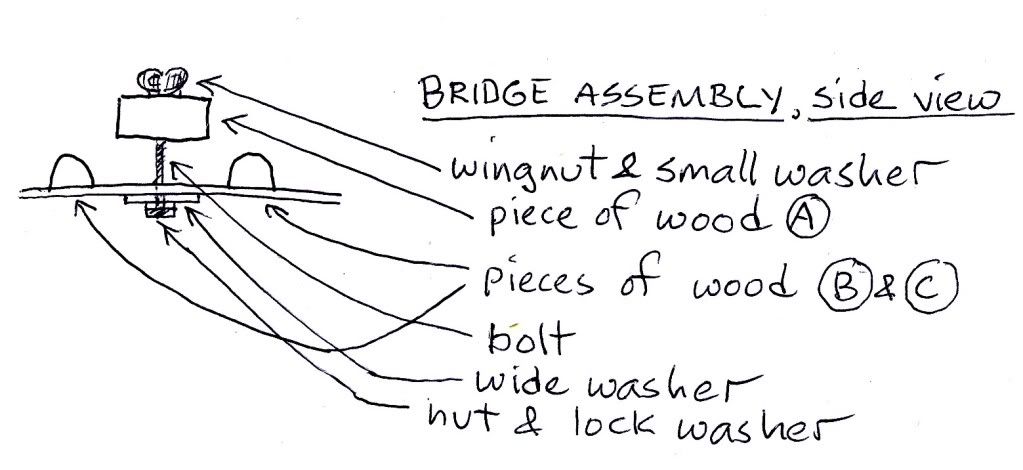
Make a box. You’ll need a piece of thin plywood that will cover the entire top of the box. The back of a trashed bureau should do nicely. To this you will need to attach the bridge assembly. You can drill all the necessary holes and insert the necessary bolts before attaching the top to the rest of the box. Cut a hole in the top that’s big enough to put your hand through…but not much bigger. Here’s a side view of the bridge assembly:

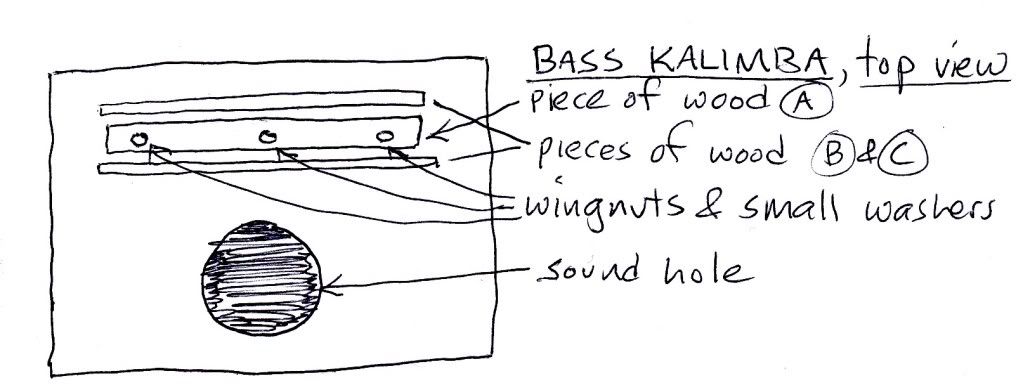
Now attach the top board to the box. Use nails and glue, and make sure it seals properly all around. Pieces of wood B and C can be glued to the top. It should look like this:

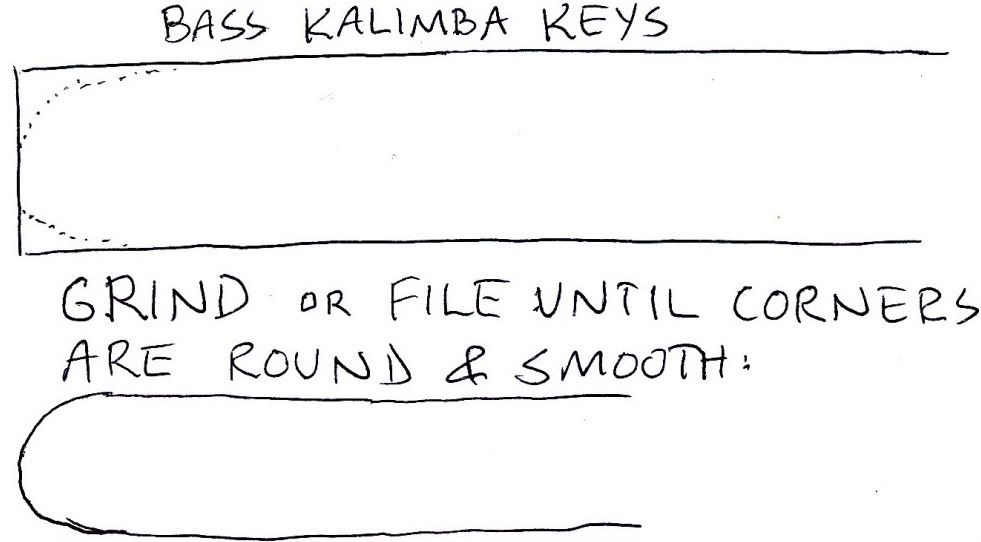
Snip the metal strapping tape into short lengths ranging from 4 to 6 inches:

These are the bass kalimba’s keys. Fit them under A and over B & C, then tighten the wingnuts (and how long has it been since a political blog featured the original meaning of the word “wingnut”?) until A presses down on the keys and they bend upward. Wiggle the keys back and forth to lengthen and shorten them. The shorter they are, the higher their pitch; the longer, the lower.
I grind the keys on a grinder to eliminate all sharp edges; cut fingers are a definite hindrance to getting a good groove going.